In this article, we will discuss How To Connect Logitech Keyboard To Mac. To connect your Logitech keyboard to a Mac, first turn on the keyboard and go to System Preferences on your Mac. Then, select “Bluetooth” and choose your Logitech keyboard from the list of available devices. Click “Connect” to pair the keyboard with your Mac. Connecting your Logitech keyboard to your Mac is a simple process that can enhance your productivity and typing experience. By following a few easy steps, you can seamlessly link your keyboard to your Mac, allowing for efficient and comfortable typing.
Logitech MX Keyboard Price, Features and Review
Why Choose A Logitech Keyboard For Your Mac
When it comes to finding the perfect keyboard for your Mac, Logitech is a top choice for many users. Not only do Logitech keyboards offer enhanced functionality and features, but they also provide seamless compatibility with Mac devices. Let’s take a closer look at why choosing a Logitech keyboard for your Mac can greatly enhance your user experience.
Enhanced Functionality And Features
Logitech keyboards are designed with the user in mind, offering a range of enhanced functionality and features that make them an ideal choice for Mac users. From ergonomic designs to customizable shortcut keys, Logitech keyboards are built to enhance productivity and comfort for Mac users.
Seamless Compatibility With Mac Devices
When it comes to compatibility, Logitech keyboards are known for their seamless integration with Mac devices. Whether you’re using a MacBook, iMac, or Mac Mini, Logitech keyboards are designed to work effortlessly with Mac operating systems, ensuring a hassle-free setup and usage experience.
Checking Compatibility And Requirements
When setting up a Logitech keyboard to a Mac, ensuring compatibility and meeting the necessary requirements are vital steps. This helps avoid compatibility issues and ensures a smooth connection process.
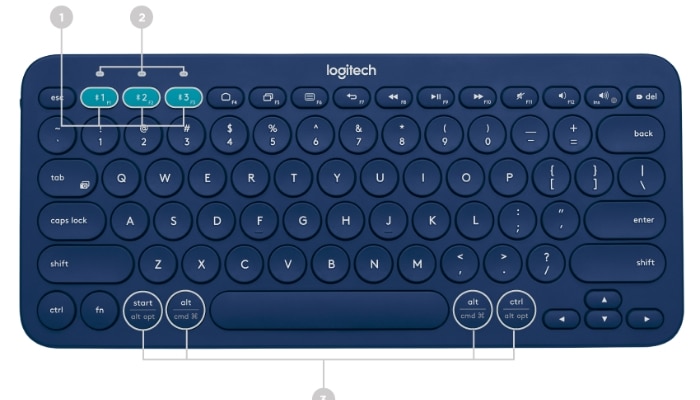
Logitech Keyboard Model Compatibility
Before connecting a Logitech keyboard to a Mac, it’s crucial to ensure that the keyboard model is compatible with Mac systems. Certain Logitech keyboards are designed specifically for Mac, such as the Logitech MX Keys for Mac and the Logitech K780 Multi-Device Wireless Keyboard. It’s essential to verify the compatibility of the specific Logitech keyboard model with Mac systems to guarantee seamless functioning.
Operating System Compatibility
Operating system compatibility is another key consideration when connecting a Logitech keyboard to a Mac. Ensure that the Mac operating system version is compatible with the Logitech keyboard. Logitech provides compatibility information for each keyboard model on its official website, specifying the supported operating systems. This can help identify if the keyboard is compatible with the Mac’s operating system version, ensuring a successful setup process.
Preparing Your Mac For The Connection
Before you can connect your Logitech keyboard to your Mac, there are a few steps you need to take to ensure a smooth and hassle-free experience. In this guide, we’ll walk you through the process of preparing your Mac for the connection, so you can start using your Logitech keyboard with ease.
Ensure Mac Is Updated
Before anything else, it’s important to make sure that your Mac is running on the latest software update. Keeping your operating system up-to-date ensures compatibility with external devices like Logitech keyboards and helps prevent any connectivity issues. To check if your Mac is updated, follow these simple steps:
- Click on the Apple menu located at the top-left corner of your screen.
- Select “About This Mac” from the drop-down menu.
- In the window that appears, click on the “Software Update” button.
- If there is an available update, click “Update Now” to install it.
- Wait for the update to complete and then restart your Mac if prompted.
Check Bluetooth Settings
Now that your Mac is up to date, the next step is to check your Bluetooth settings to ensure a successful connection with your Logitech keyboard. Here’s how you can do it:
- Click on the Apple menu and select “System Preferences.”
- In the System Preferences window, click on the “Bluetooth” icon.
- Ensure that the “Bluetooth” option is turned on.
- Your Logitech keyboard should appear in the list of available devices.
- If it doesn’t, press and hold the “Connect” button on your keyboard until it enters pairing mode.
- Once your Logitech keyboard appears, click on it to establish the connection.
Once your Mac is updated, and your Bluetooth settings are properly configured, you’re ready to connect your Logitech keyboard. Following these steps will ensure a seamless connection, allowing you to enjoy the convenience and comfort of using a Logitech keyboard with your Mac.
Pairing Your Logitech Keyboard With Your Mac
Connecting your Logitech keyboard to your Mac allows for a seamless typing experience. The pairing process is quick and easy, and in this blog post, we will guide you through the steps to ensure a successful connection. Here’s how to get started:
Turning On The Keyboard
Before beginning the pairing process, make sure your Logitech keyboard is turned on. Locate the power switch on the side or back of the keyboard and slide it to the “On” position. It’s important to note that some Logitech keyboards have a button that needs to be pressed to power them on. Refer to your keyboard’s user manual for specific instructions regarding the power switch or button.
Activating Bluetooth On Your Mac
To connect your Logitech keyboard to your Mac, you need to activate Bluetooth on your computer. Follow these simple steps:
- Click on the Apple menu in the top-left corner of your screen.
- Select “System Preferences” from the dropdown menu.
- In the System Preferences window, click on “Bluetooth.”
- Ensure that the Bluetooth checkbox is selected to turn on Bluetooth.
If Bluetooth is already turned on, you can skip this step and proceed to the next one.
Initiating The Pairing Process
Now that your Logitech keyboard is turned on and Bluetooth is activated on your Mac, it’s time to initiate the pairing process:
- Press and hold the Bluetooth button on your Logitech keyboard. The Bluetooth button is usually located on the top or bottom of the keyboard and is denoted by the Bluetooth logo.
- While holding the Bluetooth button, look for the keyboard’s name to appear in the list of available devices on your Mac’s Bluetooth settings.
- Once you see the keyboard’s name, click on it to select it.
- Follow any on-screen prompts or input a passkey if required. The passkey is a unique code that ensures a secure connection between the keyboard and your Mac.
After completing these steps, your Logitech keyboard should be successfully paired with your Mac. You can now enjoy a wireless typing experience. If you encounter any difficulties during the pairing process, refer to your keyboard’s user manual or visit the Logitech support website for troubleshooting steps. Happy typing!
Troubleshooting Common Connection Issues
If you’re experiencing trouble connecting your Logitech keyboard to your Mac, don’t worry! We’re here to help you troubleshoot common connection issues. Below, we’ve outlined the most common problems users face and their simple solutions.
Keyboard Not Recognized By Mac
If your Mac doesn’t recognize your Logitech keyboard, there are a few things you can try:
- Ensure that the keyboard is turned on and the batteries are not depleted. Replace the batteries if necessary.
- Check the USB connection between your keyboard and Mac. Make sure it is securely plugged in.
- Restart your Mac. Sometimes, a simple restart can resolve connectivity issues.
- Verify that your Mac’s Bluetooth is turned on. Go to “System Preferences” > “Bluetooth” and ensure that the checkbox next to “Bluetooth” is selected.
Intermittent Connectivity Problems
Are you experiencing intermittent connectivity problems with your Logitech keyboard and Mac? Here’s what you can do:
- Ensure that there are no obstacles between the keyboard and your Mac that could interfere with the signal.
- Move your keyboard closer to your Mac to improve signal strength.
- Try using your keyboard on a different surface. Some surfaces may interfere with the keyboard’s signal.
- Check for wireless devices nearby that may be causing interference. Move them away from your Mac and keyboard, if possible.
- Restart your Mac and keyboard to refresh the connection.
- Try removing and re-pairing your keyboard with your Mac’s Bluetooth. Go to “System Preferences” > “Bluetooth” and remove your keyboard from the list of devices. Then, follow the pairing instructions provided by Logitech.
If the intermittent connectivity issues persist, you may want to update the firmware on your Logitech keyboard or perform a software update on your Mac. Contact Logitech support for further assistance if necessary.
Optimizing Your Logitech Keyboard Settings
Customizing Key Functions
One of the key benefits of using a Logitech keyboard is the ability to customize its key functions according to your needs. To do this:- Open the Logitech Options software on your Mac.
- Navigate to the Key Assignment tab.
- Select the key you want to customize from the displayed list.
- Choose the desired function or action you want the key to perform.
- Save your changes.
Adjusting Backlighting Settings
Logitech keyboards often come with backlighting features that can be adjusted to suit your preferences. To adjust the backlighting settings:- Access the Logitech Options software on your Mac.
- Navigate to the Illumination tab.
- Select the backlighting option you want to modify, such as brightness or color.
- Use the provided sliders to adjust the settings according to your liking.
- Save your changes.
Using Additional Logitech Software For Mac
Using additional Logitech software for Mac offers seamless integration of your Logitech keyboard with your Mac system. By installing the Logitech Options software, Mac users can access a plethora of advanced features and customizable gestures that enhance the functionality of their Logitech keyboard.
Installing Logitech Options Software
Installation of the Logitech Options software on your Mac is a straightforward process that can be completed in a few simple steps. Begin by visiting the Logitech official website and navigating to the Downloads section to find the Logitech Options software for Mac. Once downloaded, follow these steps to install the software:
- Double-click the downloaded file to start the installation process.
- Follow the on-screen prompts to complete the installation.
- After installation, restart your Mac to activate the Logitech Options software.
Utilizing Advanced Features And Gestures
With the Logitech Options software installed on your Mac, you can take advantage of a range of advanced features and customizable gestures that enhance the functionality and efficiency of your Logitech keyboard. Some of the advanced features include:
- Customizable function keys to tailor the keyboard to your specific needs.
- Smart backlighting control for adjusting the keyboard’s backlight based on ambient light.
- Enhanced pointing precision and cursor control for seamless navigation.
Moreover, the software enables you to define specific gestures for smooth and intuitive navigation, further optimizing your workflow on the Mac.
Tips For Maintaining A Stable Keyboard Connection
Ensuring a stable connection between your Logitech keyboard and your Mac is crucial for a seamless and productive workflow. Here are some tips to help you maintain a stable keyboard connection.
Keeping Bluetooth Range In Mind
Place your Logitech keyboard close to your Mac to ensure a strong Bluetooth connection. Maintaining a distance of less than 30 feet between the devices can minimize signal interference and improve connection stability.
Avoiding Interference
Minimize interference by keeping your Logitech keyboard away from other electronic devices that emit wireless signals, such as routers and smartphones. Additionally, be mindful of physical obstructions, as they can also disrupt the Bluetooth signal between the keyboard and your Mac.
FAQ’s
How Do I Connect A Logitech Keyboard To My Mac?
To connect a Logitech keyboard to your Mac, turn on Bluetooth on your Mac and the keyboard. Open System Preferences, go to Bluetooth and click on “Set Up New Device. ” Follow the on-screen prompts to complete the pairing process.
Can I Connect Multiple Logitech Keyboards To One Mac?
Yes, you can connect multiple Logitech keyboards to one Mac. Each keyboard will need to be paired separately following the same process of turning on Bluetooth on the Mac, opening System Preferences, and setting up each keyboard as a new device.
How Do I Troubleshoot Logitech Keyboard Connection Issues On My Mac?
If you are experiencing connection issues with your Logitech keyboard on your Mac, start by checking if Bluetooth is turned on. Make sure the keyboard is in pairing mode and try re-pairing it with your Mac. Restarting your Mac and updating the Logitech driver may also help resolve any connectivity problems.
Conclusion
Connecting your Logitech keyboard to your Mac is a straightforward process that can greatly enhance your productivity and typing experience. By following the simple steps outlined in this guide, you can effortlessly pair the two devices and enjoy seamless typing on your Mac.